A console table can add both functionality and style to your home, but over time, wear and tear may take its toll.
From scratches and loose joints to more significant structural damage, a well-loved console table might need some attention to restore its former glory. In this blog post we will show you how to repair console table so that it functions properly. Read on to learn more about which components and tools are needed for the job as well as detailed instructions on completing the task!
Common Issues That Require Repair
Before starting any repairs, it’s important to identify the specific problems your console table is facing. Here are some common issues that often require attention:
Scratches and Surface Damage
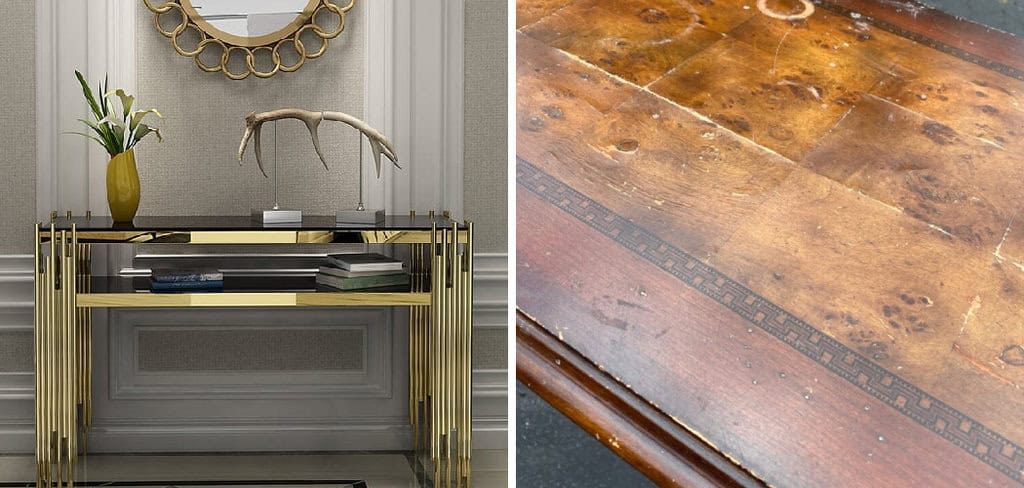
Frequent use can lead to scratches, dents, or discoloration on the table’s surface. These imperfections not only affect the visual appeal of the table but may also compromise the finish, leaving it vulnerable to further damage.
Loose or Wobbly Legs
Over time, the legs of the console table may become loose or unstable, making the table wobbly. This is often caused by loose screws, weakened joints, or wear on the connecting hardware.
Peeling or Chipped Veneer
If your table has a veneer finish, the thin layer may peel or chip away due to environmental factors, moisture, or regular use. This can expose the underlying material and affect the table’s appearance.
Broken or Damaged Components
Key structural components, such as support beams or decorative elements, can crack or break, impacting both the stability and aesthetics of the table.
Sticky or Stuck Drawers
Console tables with drawers sometimes encounter issues like sticking or difficulty opening and closing. This is often due to misaligned tracks, swollen wood, or dirt build-up.
By identifying these issues, you can address them effectively and restore your console table to its original beauty and functionality.
Why Repair Instead of Replace?
Opting to repair a console table instead of replacing it comes with several benefits. First, repairing is a more cost-effective solution, as addressing specific issues is often significantly cheaper than purchasing a new piece of furniture.
Additionally, it allows you to preserve the original craftsmanship and sentimental value, particularly if the table is a family heirloom or holds personal significance. From an environmental perspective, repair reduces furniture waste and minimizes the demand for new materials, contributing to a more sustainable lifestyle. Lastly, restoring a table gives you an opportunity to customize or improve it to better suit your current needs, adding a unique touch that a brand-new table might lack. Repairing, therefore, is both a practical and meaningful choice.
10 Methods How to Repair Console Table
1. Stabilizing Wobbly Legs

A wobbly console table can be frustrating and unsafe. The first step is to inspect the joints where the legs attach to the table frame. If the legs are loose, tighten any existing screws or bolts. If the problem persists, remove the leg and apply wood glue to the joint before reattaching it.
Secure it in place using clamps or additional screws, ensuring it is aligned correctly. Let the glue dry fully before using the table. If the legs are uneven, consider adding adhesive felt pads to the shorter leg for balance.
2. Fixing Scratches and Surface Damage
Over time, console table surfaces may develop scratches, scuffs, or water rings. For minor scratches, apply a wood repair marker or a mix of olive oil and vinegar to conceal the damage. For deeper scratches, lightly sand the affected area and apply a matching wood filler. Once dried, sand it smooth and apply a new layer of stain or polish to blend with the rest of the table. Finish with a protective sealant to prevent future damage.
3. Repairing a Broken or Loose Drawer
A console table drawer can become misaligned, wobbly, or even fall apart due to worn-out slides or loose joints. Start by removing the drawer and inspecting its components. Tighten any loose screws in the tracks or runners. If the wooden joints are coming apart, apply wood glue and clamp the drawer until the glue sets. For broken or missing tracks, replace them with new slides that match the original design to ensure smooth operation.
4. Replacing Chipped or Peeling Veneer
If the console table has a veneer finish, chips or peeling areas can affect its appearance. To repair it, carefully remove any loose veneer using a putty knife. Apply wood glue to the back of the veneer and press it down firmly. If a section is missing, cut a new veneer piece to fit and glue it in place. Use clamps or a heavy object to hold it down while drying. Sand the edges lightly and finish with a stain or paint that matches the rest of the table.

5. Reinforcing Weak Joints and Connections
If your console table feels unstable, the problem may lie in its joints. Turn the table upside down and inspect where the legs, supports, or frame connect. Apply wood glue to any weak joints and reinforce them with screws or brackets. If dowels are used, consider replacing any damaged ones. Let the glue dry completely before using the table to ensure a strong and secure structure.
6. Fixing a Sagging or Bowed Tabletop
A sagging tabletop can make a console table look unattractive and unusable. To fix this, turn the table over and place it on a flat surface. Check if the issue is due to weak support beams underneath. Reinforce the tabletop by adding wooden braces or cleats underneath. Attach them with screws or brackets to ensure they hold the tabletop in a straight position. If the tabletop is severely warped, place weights on it and allow it to flatten over time.
7. Replacing or Tightening Hardware
Loose or missing hardware can make a console table less functional. Check all screws, bolts, and metal brackets to ensure they are secure. If any are missing, replace them with similar-sized fasteners. If the screw holes have become stripped, use wood filler or toothpicks dipped in wood glue to fill the holes before reinserting the screws. This will create a tighter grip and prevent further loosening.
8. Refinishing or Painting for a Fresh Look
If your console table has faded, chipped paint, or a worn finish, refinishing it can restore its beauty. Begin by sanding the entire surface to remove old paint or stain. Wipe off any dust before applying a fresh coat of stain or primer, followed by paint or varnish. Use a high-quality brush or roller for an even finish. Allow the table to dry completely before placing any objects on it.

9. Fixing Split or Cracked Wood
Wood cracks can weaken a console table’s structure. To repair them, clean out any debris from the crack using a brush. Apply wood glue into the crack and clamp the area tightly until the glue sets. If the crack is large, use a matching wood filler to fill the gap. Once dried, sand the area smooth and apply stain or paint to blend it with the rest of the table.
10. Adding Protective Pads and Bumpers
To prevent future damage to your console table, attach protective felt pads under the legs to prevent floor scratches. Use silicone bumpers or glass protectors if the table has a glass top. These small additions can prolong the table’s lifespan by reducing wear and tear.
Things to Consider When Choosing a Console Table
When selecting a console table, consider the space where it will be placed. Measure the area carefully to ensure the table fits without overcrowding the room. Pay attention to the material and finish to match the existing décor—wood adds warmth, while glass or metal can lend a modern touch.
Additionally, think about the table’s functionality; some designs offer storage options like drawers or shelves, which can be useful in organizing your space. Lastly, consider the weight and sturdiness of the table, especially if it will support heavy items or be placed in a high-traffic area.
Troubleshooting Common Issues
When selecting and setting up a table, a few common issues may arise. First, improper measurements can lead to selecting a table that is too large or too small for your space. Always double-check your room’s dimensions and the table’s size before purchasing.
Another frequent challenge is wobbliness, which can often be addressed by tightening screws or using leveling pads under the legs. Scratches or damage to the table surface can occur over time; using protective covers or coasters can help prevent this, while wood polish or repair kits can fix minor blemishes. Finally, mismatched styles can disrupt the room’s harmony, so ensure the table’s design complements your existing furniture and color scheme for a cohesive look.

Conclusion
Repairing a console table not only restores its functionality but also preserves its aesthetic appeal. Whether it’s fixing wobbly legs, scratches, broken drawers, or sagging tops, these ten methods provide effective solutions for maintaining your table.
With proper care and occasional maintenance, your console table can continue to be a stylish and useful addition to your home for years to come. Thanks for reading our blog post on how to repair console table! We hope you found it helpful and informative.